This blog is basically two blogs combined into one. I recently did two different jobs on the Bandit, but since one job was completed almost a month ago, and I have not written in a while, I decided to combine them into one blog. Besides, the first job wasn’t fully completed until yesterday.
The first job had to do with bleeding my hydraulic clutch. For most motorcycles, the clutch is actuated by a cable on the lefthand of the handlebar. On the Bandit, it basically uses a brake master cylinder to actuate it. The master cylinder is quite literally the same master cylinder as used on the front brakes, just flipped around. I used my pneumatic brake bleeder the same way as I used on my chevy. I put off bleeding the clutch for a while, as I thought that the process would be a little different. However, it turned out to be exactly the same as if you were bleeding a brake caliper, and the process is no different regardless if you were bleeding brakes or the clutch, regardless whether you were doing it manually or with a tool.
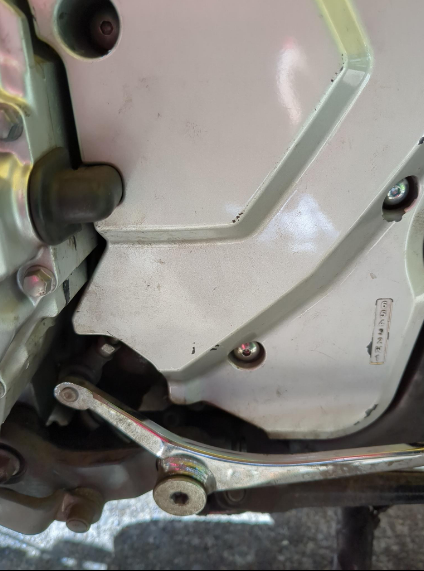
The clutch bleeder screw is located underneath a cover on the left side of the bike, secured by 3 hex/allen head bolts. I do not like that style of bolt, as they strip out easily, and generally they’re a pain to deal with. These bolts are particularly annoying, as they’re deep inside a hole, meaning that if the bolt head is stripped, it becomes a nightmare to pull out. This is exactly what happened. The bottom bolt stipped out, however I managed to bleed the system by pull the cover back far enough to fit my bleeding hose over the screw, and bleed the system. If I did not have my pneumatic bleeder, I would have had to somehow take the bolt off if I wanted to bleed the system.
After that job was finished, I set that problem aside for a later date. Yesterday, I decided to tackle the problem. I first tired switching to an SAE size, as the similar sized SAE allen/hex is slightly bigger than the metric. However, the inside of the bolt head was too rounded off, and the tool spun freely. Next, i tried using tin foil, and then a rubber band, to get any sort of friction against the bolt head, both using metric and SAE sizes. That too failed. Finally, I pulled out my drill and bolt extractor kit. I prefer to not use this option if I have to, as there’s always the risk of punching through the bolt, and punching into the engine, something I did a long time ago when I first started rebuilding my Honda Shadow. Thankfully, I’ve learned a lot since then, and I managed to extract the bolt.
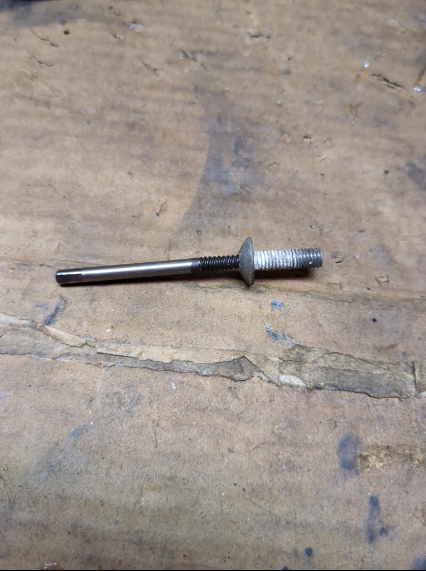
The process is simple: You fist take a pointed cold chisel/extreme point punch, and give a good whack with a hammer to create a dimple where you’re going to drill. Next, you take a drill bit with the smallest reasonable size you can, and drill into it a little ways, then work your sizes up until you get to the appropriate size drill bit for the extractor you’re going to use. I needed a 9/64ths drill bit, so I started out smaller and worked my way up. After drilling my 9/64ths hole, I took my extractor bit, and hammered it in. I used a pair of vice grips to unbolt the bolt. Luckily for me, I had a few extra bolts on standby from a previous job, where the same style of bolt was stripped in a similar manner, so I slid the new one in.
I hate hex head bolts. Automotive industry pls stop using them.
The second job was also a confusing finish. I do not remember when I first noticed it, but a while back I noticed that the radiator fan of the Bandit was not turning on, even in hot weather, and when I was riding it hard on the track. I grew concerned, so I purchased an IR temperature thermometer, and began recoding readings after rides. All of my temperatures were well within the specs of the temperature range. At the same time, I noticed a ghostly humming noise whenever the bike was turned on. Concerned that the fan was somehow broken, or worse, that my bike was overheating somehow, I spent a good 3 hours yesterday diagnosing various issues with the fan/cooling system. I checked the coolant, and both the main coolant fill point underneath the gas tank, and the overflow reservoir, had coolant inside of it. I tested the realy for the fan switch, and it worked fine. I tested the leads to the DC motor for the fan, and they tested fine as well. The only thing left to do was to drain the coolant, and test the thermometer, and the actual switch for the fan. However, I decided first to go for a ride, and see if I could pinpoint where the ghostly hum was coming from. After returning, the bike shot out some coolant, and the fan turned on.
After reading various heat related issues with water cooled motorcycles, I came to the conclusion that the likely cause was the throttle body sync I did over a month ago. The bike was probably running far hotter than it normally should have been due to the throttle body imbalance, and syncing the throttle bodies has made my bike run cooler. I still do not know what the ghostly hum is caused by, but I suspect it may be something with the fuel pump.
Mechanicing is difficult and confusing. Half of the time I feel like I’m some sort of shaman performing rituals to the machine god in order to get my stuff running.
Below are the pictures from the repairs.

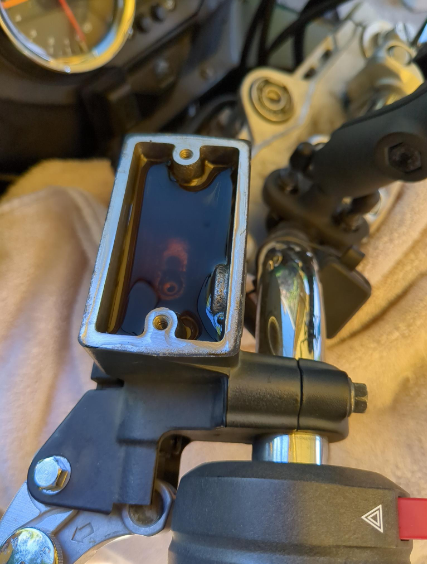
The master cylinder for the clutch. This is the only picture I took of the job. As you can see, the fluid is quite dirty, and filled with water. I used DOT 4 brake fluid, and like the chevy, the fluid afterwards was clear.

The bottom bolt is the bolt that was giving me trouble.

What it looks like to extract a bolt.